روش تعمیر خطای DNS Server در ویندوز 10 در هنگام اتصال به اینترنت
Fix: Your Computer Appears to be Correctly Configured, but the Device or Resource (DNS server) is not Responding
This error message is the one which appears after running a network troubleshooter on any version of Windows from Windows 7 and it indicates that there is a problem regarding your DNS server which is causing further Internet connection problems.
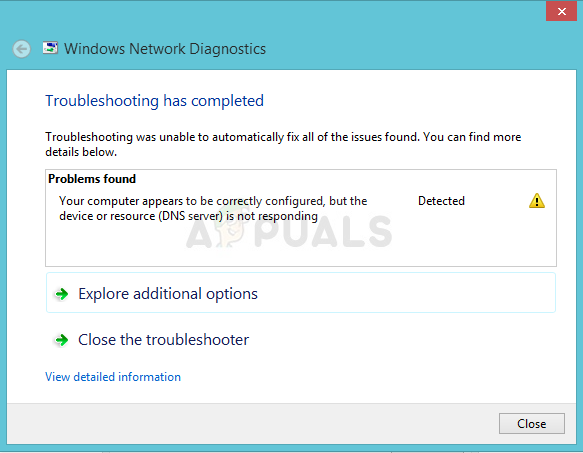
Your computer appears to be correctly configured, but the device or resource (DNS server) is not responding
The problem is quite popular and people are always looking for new methods to try out. We have gathered the working methods we could find and put them all together in a single article in order to help out future people who struggle with the same problem. Good luck in resolving the issue!
What Causes this Error?
The list of possible causes is not long and it’s something you might expect from a DNS problem. The key to resolving this problem lies in its cause and we highly recommend you check out this list:
- Faulty or outdated network drivers are a number one cause and they should be updated as soon as possible. This will prevent future errors from appearing as well.
- You might be using the wrong DNS and IP addresses. You should consider either switching to default settings or changing the DNS server to Google’s.
Solution 1: Update or Roll Back Your Network Drivers
To be honest, updating and rolling back the driver are two opposite actions but it all depends on which driver brought the error to your computer. If you are running old, no-longer-supported drivers on your computer, then an update is almost certain to solve the problem.
However, if the problem started to occur after you have updated your driver one way or another; a rollback might be good enough until a new, more secure driver is released. You should also update or rollback the network device you are using to connect to the Internet (Wireless, Ethernet, etc) but performing the same process all of them should do no harm.
- First of all, you will need to uninstall the driver you currently have installed on your machine.
- Type “Device Manager” into the search field next to the Start menu button to open the device manager window. You can also use the Windows Key + R key combination in order to open the Run dialog box. Type devmgmt.msc in the box and click OK or Enter key.
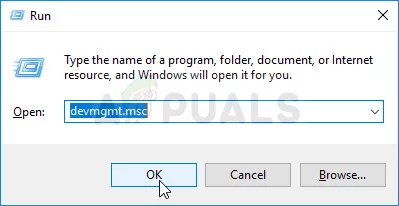
Running Device Manager
- Expand the “Network Adapters” section. This will display all network adapters that the machine has installed at the moment.
Update the Driver:
- Right-click on the network adapter you want to uninstall and select “Uninstall device“. This will remove the adapter from the list and uninstall the networking device.
- Click “OK” when prompted to uninstall the device.
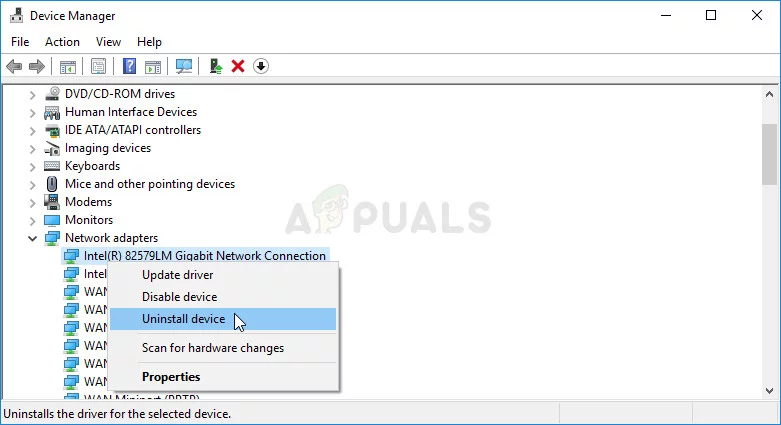
Uninstalling your networking device driver
- Remove the adapter you are using from your computer and navigate to your manufacturer’s page in order to see the list of available drivers for your operating system. Choose the latest one, download it, and run it from the Downloads folder.
- Follow the instructions on-screen in order to install the driver. If the adapter is external such as a Wi-Fi dongle, make sure it stays disconnected until the wizard prompts you to reconnect it to your computer. Restart the computer and check to see if the problem has disappeared.
Rolling Back the Driver:
- Right click on the network adapter you want to uninstall and select Properties. After the Properties window opens, navigate to the Driver tab and locate the Roll Back Driver option.
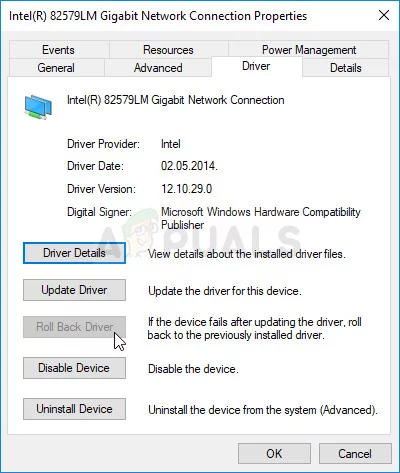
Try to roll back driver if it was updated recently
- If the option is grayed out, it means that the device wasn’t updated recently as it has no backup files remembering the old driver. This also means that the recent driver update is probably not the cause of your problem.
- If the option is available to click on, do so and follow the instructions on-screen to proceed with the process. Restart the computer and check to see if the problem still occurs in Command Prompt.
Solution 2: Change the DNS and IP Addresses you are using
If you have tweaked some of these settings in the past, you may want to consider returning everything to how it was before in order to resolve this problem. On the other hand, if you haven’t configured these settings before, you might want to try and use other DNS addresses such as Google’s DNS address available for free.
PRO TIP: If the issue is with your computer or a laptop/notebook you should try using Restoro Repair which can scan the repositories and replace corrupt and missing files. This works in most cases, where the issue is originated due to a system corruption. You can download Restoro by Clicking Here
- Use the Windows + R key combo which should immediately open the Run dialog box where you should type ‘ncpa.cpl’ in the bar and click OK in order to open the Internet Connection settings item in Control Panel.
- The same process can also be done by manually Control Panel. Switch the View by setting at the top right section of the window to Category and click on Network and Internet at the top. Click the Network and Sharing center button in order to open it. Try to locate the Change adapter settings button at the left menu and click on it.
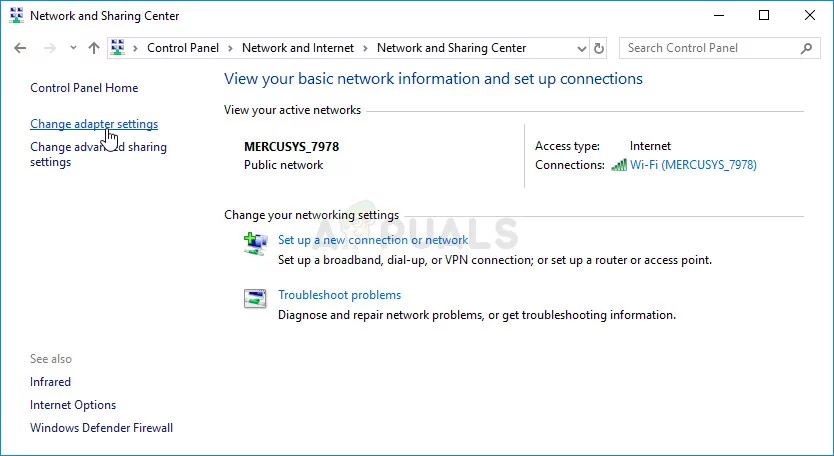
Change adapter settings in Network Sharing Center
- Now that the Internet Connection window is open using any method above, double-click on your active Network Adapter and click on the Properties button below if you have admin permissions.
- Locate the Internet Protocol Version 4 (TCP/IPv4) item on the list. Click on it in order to select it and click the Properties button below.
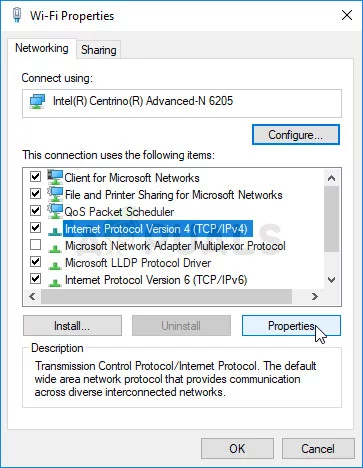
IPv4 Properties
- Stay in the General tab and switch both radio buttons in the Properties window to “Obtain an IP address automatically” and “Obtain DNS server address automatically” if they were set to something else.
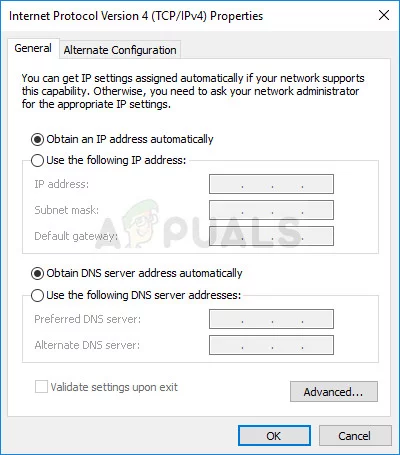
Switching IP and DNS settings to default
- If they weren’t, still choose “Obtain an IP address automatically” only this time keep the “Use the following DNS server addresses” button checked and use 8.8.8.8 and 8.8.4.4 for the Preferred and Alternate DNS server respectively.
- Keep the “Validate settings upon exit” option checked and click OK in order to apply the changes immediately. Check to see if the same error appears after running the network troubleshooter!
Solution 3: Clear Your DNS Cache and Reset Your IP Settings
This method is quite popular for its simplicity and plenty of people use it in order to fix most things related to connectivity issues. The funny thing is that it works and users have commented saying that this is the only step it took to resolve the problem. Try it out now!
- Search for “Command Prompt” by typing it either right in the Start menu or by pressing the search button right next to it. Right-click the first entry which will pop up as a search result and select the “Run as administrator” context menu entry.
- Additionally, you can also use the Windows Logo Key + R key combination in order to bring up the Run dialog box. Type in “cmd” in the dialog box which appears and use the Ctrl + Shift + Enter key combination for admin Command Prompt.
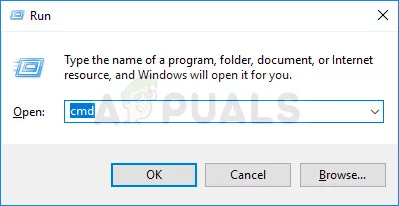
Running Command Prompt as an Administrator
- Type in the following commands in the window and make sure you press Enter after typing each one. Wait for the “Operation completed successfully” message or something similar to know that the method worked.
ipconfig/flushdns
ipconfig/release
ipconfig/release6
ipconfig/renew
- Try to reconnect to the Internet and check to see if the error still appears!


